Howdy Folks,
Many horses, like my Kessy, have breathing issues, and should never have moldy, or slightly moldy, or even dusty hay (And horses with no issues can develop them eating dusty, or moldy hay). My research proved to me that soaking is not good enough, research and my own trials. Mold spores don’t die if soaked, but they do die at temperatures above 130 degrees, and steam of course occurs above 210. I checked the temps in my steamer, inside flakes of hay, it is consistent at 180.
 |
| My homemade hay steamer I built for about $100.00. Big plastic tote, wallpaper steamer, a little cpvc pipe and fittings. I put the carpenter clamps on the lid to be sure the lid it seals while steaming. You can see here the tub, the steamer and hose. |
I built my first hay steamer from plans I found on the internet over a year ago, so credit them. I’d been soaking Kessy’s hay, and that worked, sort of. But she got worse over time, so I built the steamer. Note here, even on the steamed hay eventually she developed full blown heaves ... with management practice adjustments, and help from Dr Thomas’ Chinese Herbs (Read that story HERE) she is totally recovered. I point all this out because addressing all aspects is sometimes what it takes. Another note—whether we see it or not, most hay has some mold in it, of course sometimes we actually see and smell it.
I just had to rebuild my hay steamer, the tub eventually breaks down. I steam Kessy’s hay 2 hours morning and night.
So here is a very simple way to build your own steamer for about $100.00.
I start with a big storage tote found everywhere. I like the largest I can find, mine is 36 inches by 20 and 20 inches high. Kessy is my only horse, she gets 10 pounds of hay, in slow hay feed nets, morning and evening—and the 2 bags of 5 pounds each fit nicely in this tote. I like to steam in the net, much easier and neater. The steam is produced by a Wagner Wallpaper Steamer I bought at Lowes for $59.00. I have mine set on a timer to steam just before I feed morning and night for 2 hours, so it’s always fresh and always ready. Note—you must use a heavy duty timer or it’ll burn out the steamer, I learned the hard way.
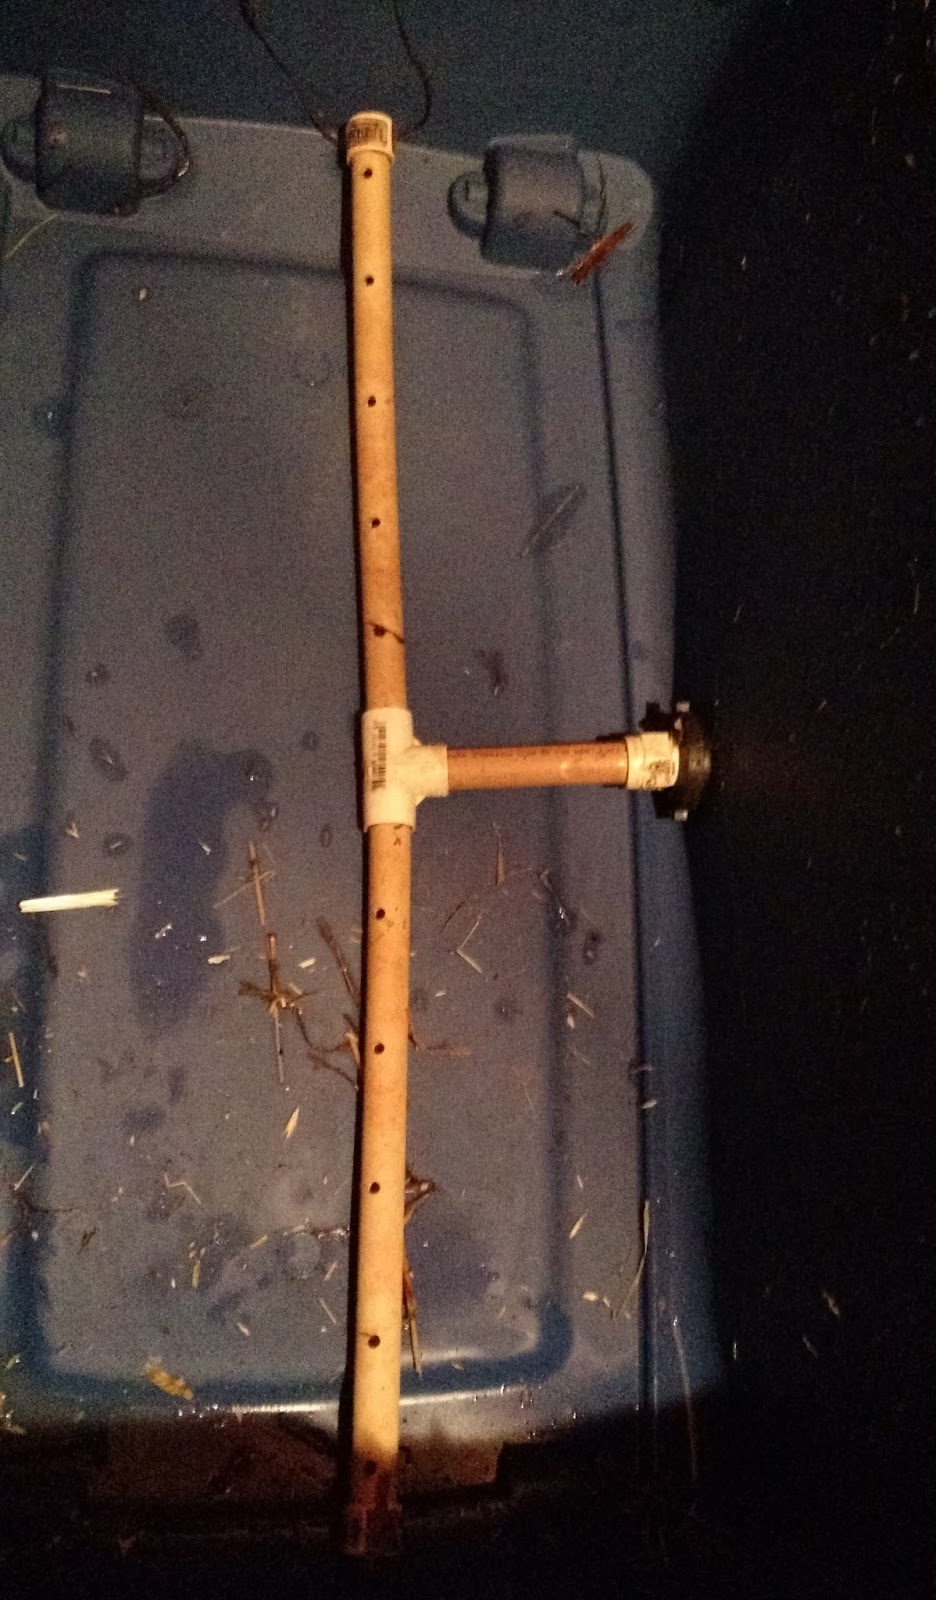 |
| Inside the tote you see the steam manifold laying on the bottom. 36"of 1" cpvc pipe with 1/4" holes every 4". Note the tee, And the fitting through the wall. You'll need adapters for that fitting. You must measure the hose on the steamer you buy and with adapters bring it to the 1" size of the manifold. I do that with the pass-through connectors. |
 |
| Here is the outside of the pass-through hole. Look closely to see the fittings and the steamer hose cut to length and clamped on fitting. This took several pieces, the nipple to clamp the hose onto, the adapter to bring it up to 1", and the big sealing nuts and washers. |
 |
| I used the Wagner Power Steamer, which I found at Lowes for $59.00. |
Attach the hose from the steamer to the pass through adapter (I cut it at 3 feet length), and you’re ready to steam. Steaming time can vary, should not be less than 45 minutes, I like 2 hours—my provider bales REALLY tight bales and less than 2 hours did not always steam all the way through good enough.
 |
| Kessy's hay in slow hay feed bags ready to steam. I put 5 pounds in each bag each am & pm. |
There ya go, an easy to build, easy to use hay steamer. Personally with all I’ve read about the benefits of steamed hay, I’d feed it now even if my horse had no issues. Hope this helps you!
Gitty Up, Dutch Henry.
Hi Dutch! Great post. Dawn Harrison (Horse and Man) posted a version about two years ago, but of course, I can't find it. This comes at just the right time, so thank you!
ReplyDeleteI knew steaming kills mold and dust, perfect for horses with respiratory issues like heaves, but is it possible that it may also remove some of the sugars in the hay? My TWH, George, was recently and officially diagnosed as IR/EMS,and my OTTB is sensitive to dusty hay. I was wondering if I could kill two birds with one stone and just steam their hay, instead of soaking for one horse and steaming for the other.
Thanks for any input!
Robynne, steaming will reduce sugar content by only a little, not enough to make high sugar hay okay. Have you tested your hay? Can you purchase hay that is tested? We want to be below 10% non-structured carbs. But you need to soak at least an hour if you're trying to reduce sugar. ~ Dutch.
ReplyDelete